Relay Control Using NodeMCU
Through ThingsLinker Timer
About
The ESP8266 module is a module that allows our microcontroller to connect to a WiFi network or to create an access point for our devices.
The application that we will use for our form is “ThingsLinker” downloaded for free from the Play Store. Through “ThingsLinker” we can control the switching on and off of an LED through our WiFi network.
WARNING
Switch off the main switch before removing the switch box. Playing with live AC wires can be dangerous.
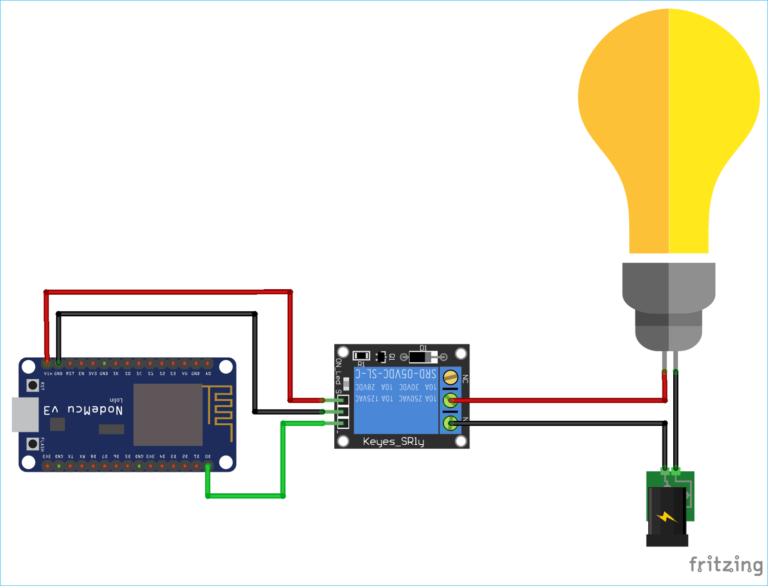
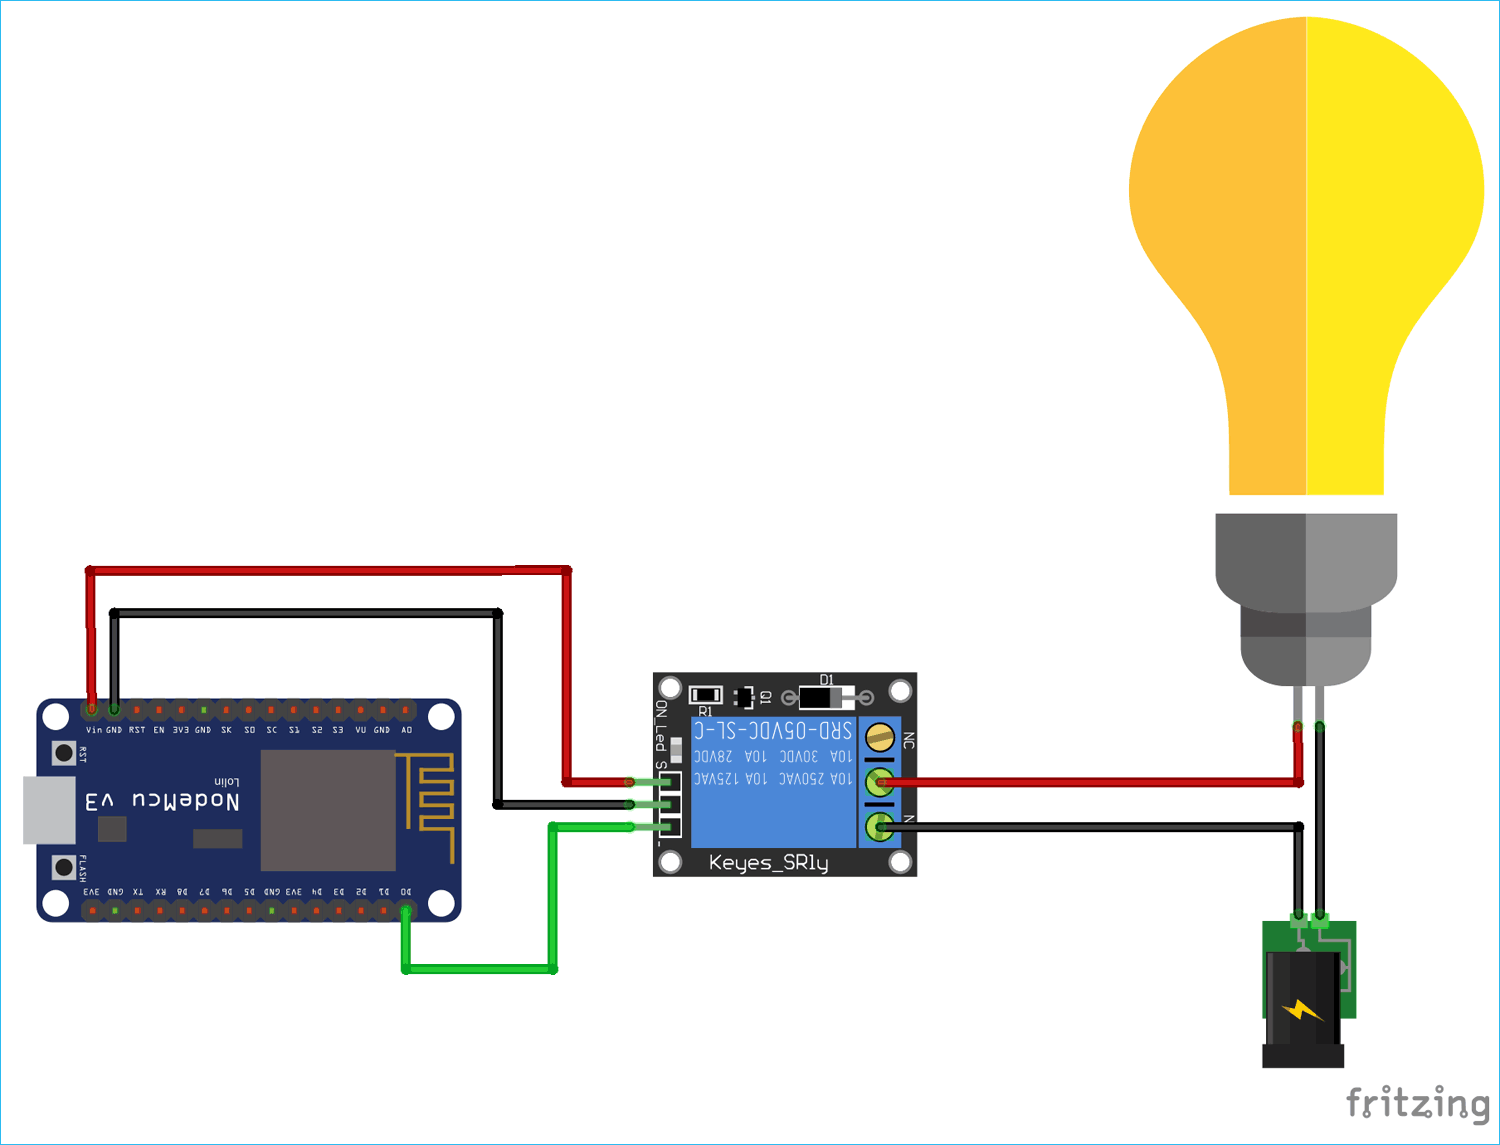
Hardware Components
- NodeMCU
- Bulb
- Relay 5v
- Holder
- Jumper Wires
- Plug
- Micro USB Cable
Software Components
- Arduino IDE
- ThingsLinker App
Download & Preparing the Arduino IDE
- To download the software head over to the Arduino site: https://www.arduino.cc
- Click on Software Click on either Windows, Mac or Linux based on your Operating System.
- You can donate if you want or just download.
- After downloading Preparing the Arduino IDE.
- File tab and then click on Preferences.
- In the additional Boards Manager URLs add the following link (http://arduino.esp8266.com/stable/package_esp8266com_index.json)
- Click OK and then navigate to
- Tools – Boards – Boards Manager
In the search field type esp8266 > click the esp8266 by ESP8266 Community – Click Install
Now you have setup the Arduino IDE to work along with the NodeMCU.
Download ThingsLinker Library
- Go to Github and download the ThingsLinker library.
- Go download folder extract that file.
- Paste ThingsLinker library in the Arduino library folder.
- Import ThingsLinker library in your project.
Setup ThingsLinker App
- Register account. ( Already have an account Sign In )
- Create Project.
- Go inside the project.
- Select widgets like On/Off Button and others.
- Select virtual pin like V1, V2 and others.
- Click Auth Token menu item.
- Send project auth token to your register email address or copy project auth token.
- Paste auth token to your arduino code.
Code
The next step is to write some code to control the LED.
- Go to ThingsLinker example and select ThingsLinkerTimer example.
- Replace “YourAuthToken” with the AuthToken you got after creating the project.
- Replace “YourWifiName” and “YourWifiPassword” With your Wi-Fi name and password.
- Add your logic to the code
- Hit Upload
- Hope you enjoy using the ThingsLinker platform.
#include
ThingsLinker thingsLinker;
//You can get auth token in the ThingsLinker App.
const char *authToken = “YourAuthToken”;
const char *ssid = “YourWifiName”;
const char *password = “YourWifiPassword”;
int LED = D0;
void setup()
{
Serial.begin(9600);
// Setup wifi connect using ThingsLinker constructor.
ThingsLinker(ssid, password);
pinMode(LED, OUTPUT);
}
void loop()
{
// Setup project auth token
thingsLinker.run(authToken);
Serial.print(“Status: “);
Serial.println(thingsLinker.getTimerOnOff(“V0”));
// You can pass Virtual pin. ex: V0 to V24, Get value
if (thingsLinker.getTimerOnOff(“V0”) == 0)
{
digitalWrite(LED, LOW);
}
else if (thingsLinker.getTimerOnOff(“V0”) == 1)
{
digitalWrite(LED, HIGH);
}
delay(1000);
}